Feast your eyes, my friends!
Please click on the HD or the link below because it's ridiculous to watch it any lower.
Making-Of
The modeling of BMW can be seen in numerous older WIP posts on my home page here, just scroll down.So, let's dive in the VFX stuff.
Blender - Camera Tracking
I shot the footage with my Fujifilm HS10 bridge camera and it's tiny sensor in 1080p in my backyard. (Yes, that is unfortunately my backyard, but I'm moving out soon :)The camera was mounted on a tripod which I held in my hands to stabilize it a little bit. You can actually see the shadow of me holding it.
Converted the footage into an image sequence and loaded it up in Blender to track it. Even though I have copy of PFTrack 5, nowadays I prefer Blender. It got real good.
The footage is pretty damn compressed so it was tough. All 604 frames that I tracked were done by hand (Blender has no "auto-track the entire footage" thing), adding tracking points manually, tracking them with Ctrl-T and tweaking them to perfection. Took a crazy amount of time, but it was fun.
Got just 0.245 solve error. Lens distortion was solved as well, and focal lenght and optical center were slightly refined.
Here's the scene. The car is actually off scale and place here, I just used it to check does it stick well.

Exporting the tracked camera to Maya was a nightmare. It took me literally two days to figure it out. The camera was off, or flipped over, not even rotated like when the axes are wrong. Way off.
Finally, I found the solution and posted it as a response to someone's question on BlenderArtists.org here if you need it.
Maya & VRay - Scene assembly, lighting, shading, rendering

I started by creating the shaders. VRayCarPaintMtl was used for the car body, while others are the usual VRayMtl.
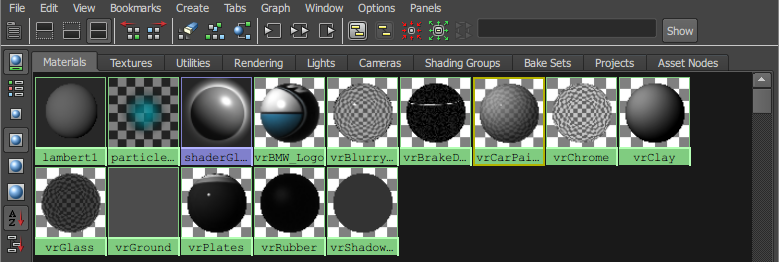 |
| All shaders in the scene |
The fun part was the ground plane. I used the VRayShadowCatcher, but it's linked to a VRayMtl that gets its diffuse texture from the camera projection of the original footage.
Here's the actual shader network pic.


I used camera projection so that the reflection of the car would show properly on the ground ie. some of the light bounces off the car at the ground making the ground brighter if you look closely in the video.
Lighting
Lighting was done using two sources, IBL dome and VRaySun.
I shot a DIY light probe which is actually a plastic reflective Christmas ball attached to a pen.
Yes, most indie projects (well, at least mine) tend to always be crazy like this.

I shot a ton of exposures from a few angles, stitched and aligned it in Photoshop and made the HDRI environment map in Picturenaut if I recall correctly.
Plugged that into a VRayDome light and aligned the VRaySun so it matches the actual sun position from the HDRI.
Rendering
 The camera was VRayPhisicalCamera for obvious advantages.
 For GI, I used an irradiance map and light cache. I first precalculated the light cache and IR map for the entire shot duration. I had to re-do this a few times to get decent quality maps that don't flicker too much.
I used the adaptive subdivision sampler because DMC was oversampling some areas needlessly.
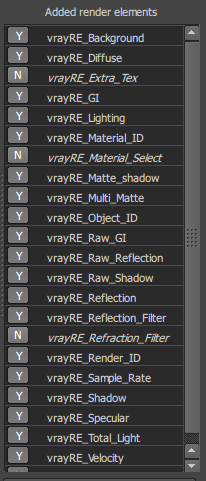
Everything was rendered to EXR files with a ton of passes as you see on the left.
Rendering 604 frames took around 50 hours with an average of 5min/frame. I did a ton of test renders before doing the final batch render.
Nuke - Compositing
The script started out simply, but ended up being really big and complex. I had to compensate and fix a lot of stuff that's not right in the renders, but rerendering for another 50h was not a (fun) option. Besides, doing compositing is one of my favorite parts of the project.
Because of my lens distortion workflow, I had to re-render about 30 frames with the zoom factor 0.8 which basically widens the FOV/shortens the focal length of the camera. Since the shadow in the raw undistorted renders gets out of the frame when the car gets close to the edge of the frame, there was no shadow data when I distort the render in Nuke. Once I re-rendered it, I animated a Switch node to switch to the new fixed and wider 1600x900 renders which were cropped to 720p so the FOV matches.
Here's the screenshot of that part of the node graph:


I merged the passes manually so I can control them individually. The reflection flicker mask part is exactly what it says. There's a slight but visible flickering just above the tires and below the hood from the crappy irradiance map. That was totally removed because it's supposed to be dark.
I also masked out the rims using VRayRenderID pass to control the specular and reflection pass.

Grading the shadow was also a tough challenge because of the weird alpha output due to the VRayShadowCatcher. It took me a while to realise that darkening the shadow was actually done by increasing the gain on the alpha channel. Duh, because the RGB data in that area is black.
I won't get into too much detail (it's already too detailed :) but that's about as interesting for you guys as it gets.
The entire script outputs a PNG image sequence.
Video editing and rendering
The final video that you watched above was edited in Blender. Blender has its quirks and it's not the best, but it's open source and good enough for me.
But let's actually get to the fun part of this.
Blender outputs useless h264 videos that literally freeze my entire computer when I play them in any player. I rendered the image sequence but there was no music obviously.
I tried making a h264 mov in Nuke by giving it the sound file but it doesn't work as Nuke has no idea what FLAC is. The actual way I solved this was like this.
I downloaded AviSynth which is a sort of a script based video editing/frameserver software. I had to write a script that dubbed the FLAC with the image sequence. Played it and it worked.
Then I used FFMPEG to actually render that script into a final file.
This whole process took me an entire day of struggling to make a proper render just because Blender's videos were crashing my PC.
Final words
This 10 month project was a shitload of fun. I did it on and off and there were a few weeks I didn't even touch it.
If you have any questions about the process, or anything really, feel free to ask in the comments below.
For job offers email me at: artofdavidg@gmail.com
I do a lot of stuff as you can see, but I'm focusing mostly on modeling and that's what I spend most of my time on.
Hope you liked it!
Thanks for reading!
David..
No comments:
Post a Comment